
Weekly Notes: 1/22-2/16
Friday
Midday: Our art presentation focused on a traditional art form of the northern regions, like
Alaska and Canada: called ‘Inuksuk’. Inuksuk or in its plural form Inuksuit, are renditions of a
person that carries a message to passers-by by stacking carefully selected rocks and slates on top
of each other. In the barren landscapes of the North the ‘arms’ of the inuksuk would point
towards a good fishing, hunting, or gathering place or convey other fundamental messages to
travelers. After showing several pictures of inuksuit, I showed the children how they can make
their personal inuksuit from a collection of various rocks and slates.
After the art presentation I got out our continent globes and discussed what the different textures
and colors represent on them. This brought us to our continent puzzle map and our discussion on
how the land on our planet Earth has been divided into the seven continents: North-America,
South-America, Europe, Africa, Asia, Australia and Antarctica.
Pm: I presented a painting of a winter landscape called A Winter Scene with Skaters near a
Castle by Hendrick Avercamp, from c.a. 1608-09. Besides it depicting a snowy scene, it is a very
busy picture full of things to look for and notice. It was painted by a Dutch artist who loved to
paint landscapes with lots of people in them. In this painting there is a city scene with a frozen
lake and people engaging in all kinds of activities, such as skating, snow-ball fighting, pushing
one another in a chair on the ice, etc. I also pointed out the solitary bare tree in the foreground
with its curvy, windy branches. The branches are all bare because the tree has lost all of its
leaves for the winter. I told the children it is such a busy painting, it would be a good idea to find
the following details on it with a magnifying glass when they have a turn with the art project:
• A person falling over while skating and another one reaching for him
• A person pushing another person in a chair on the ice
• A boat on the frozen lake
• Two children having a snow-ball fight
After discussing Avercamp’s painting I showed a water color landscape work with bare trees in
them. It is a two-day project. On the first day the children decide where they want their horizon
line and mark it in pencil. Then they paint patches of brown for the ground and leave the rest of
it white for the snow. Then they cover the sky with blue, red and purple to their taste. The next
day they use an eye-dropper to drop a few drops of thicker water color paint on the paper for
their trees and blow on their blotch of paint through a straw to make the windy branches. They
may add additional branches and twigs with the end of their straw if they want. In order to create
the perception of perspective, the trees in the foreground will be bigger, whereas the ones in the
background will be smaller. I hope the children will have lots of fun with this art project!
Monday
Midday: Our letter of the week was ‘p’ and I found tons of objects starting with it: pot, pin, peg,
plane, pan, persimmon, pear, potty, present, and pig. Our mystery animal was: penguin.
Pm: I showed a reading word where the children are supposed to match picture cards with their
labels of three-letter words. Each set of cards focuses on a different vowel. The children are
getting very comfortable associating sounds and letters and sounding out three-letter phonetic
words. After our reading work we played a co-operative board game I designed for practicing
our fish facts. What a group of fish experts we have!
Tuesday:
Midday: We had a fire drill mid-morning and I was impressed how well the children did walking
out of the building and into the street, to ‘our safe place’. Hopefully, we’ll never have to use this
skill for a real situation, but at least we know that the children are well-prepared for a case of fire
emergency. After the fire drill I showed a work called Large Hexagon Box which is a hands-on
way to show children how new geometric shapes can be formed by putting together already
existing geometric shapes; in our case using triangles to form a large triangle, a rhombus, a
hexagon, and a parallelogram. Then it was Natalee’s turn to have her Spanish lesson with the
children. She reviewed the names of farm animals and sang Old McDonald Had a Farm in
Spanish with the children.
Pm: I showed a math work today to re-inforce the concept of ‘greater than’, ‘less than’ and
‘equal’. Then we played another round of our fish board game to review all the things we know
about fish.
Wednesday:
Morning: Music with Jan! The children are having so much fun getting ready for the winter
performance! They even gave me a mini-presentation today of their favorite song! Super cute!
Our morning was rather out-of-ordinary because two UPS trucks turned up to unload 19 boxes of
new furniture. The children were very excited about seeing all the boxes piling up by the
goodbye window and we were all very happy to replace the well-loved old shelves with the shiny
new ones!
Midday: I showed a patterning work where the children match miniature dogs of various colors
on a pattern card and then figure out what comes next in the pattern and place the missing puppy
in its spot. Then I showed a work that allows children to practice their cutting skills. We talked
about how to handle scissors safely and then I showed the children how to use three fingers to
pick up the scissors and cut with them. For now they will be practicing cutting narrow strips of
paper into pieces.
Pm: I showed an addition work with our colored bead bars. Then we practices some basic math
skill, like holding up as many fingers as the number I called out. For an additional challenge I
asked the children to hold up a certain amount on one hand, then another amount on the other
hand and then we added up the fingers held up on both hands. We had a lot of fun with this
simple math game!
Thursday:
Midday: I showed a traditional Montessori work called the ‘Dressing Frame.’ It is a practical life
work and its objective is to teach children basic elements of self-care, in this case, getting
dressed. The frames are practice boards for practicing buttoning, zipping, snapping, buckling and
Velcro-ing; anything that one might come across while getting dressed. Then I told a really fun
story called ‘The Squeaky Door’. The story has lots of repetitions and after a few rounds the
children were happily chiming in with the chorus lines.
Pm: Since the children had so much fun with the story of ‘The Squeaky Door’ I thought we could
do an impromptu theatrical performance and act out the tale. All the children had parts in the
story and they did so well! We had a lot of fun putting on a little show! After our artistic outlet I
showed the children a reading work where they look at picture codes, figure out what sound the
pictures start with and bring the corresponding letters over from the movable alphabet set. When
they have brought over all the letters they sound them out and act out what the word says. Here is
a picture clue for you to decode:
If you figured out that the first sound in hat is: ‘h’, the first sound in octopus is ‘o’ and the first
sound in pig is ‘p’, then you would be hopping on one foot now, because your word is ‘hop’.
Well done!
Friday:
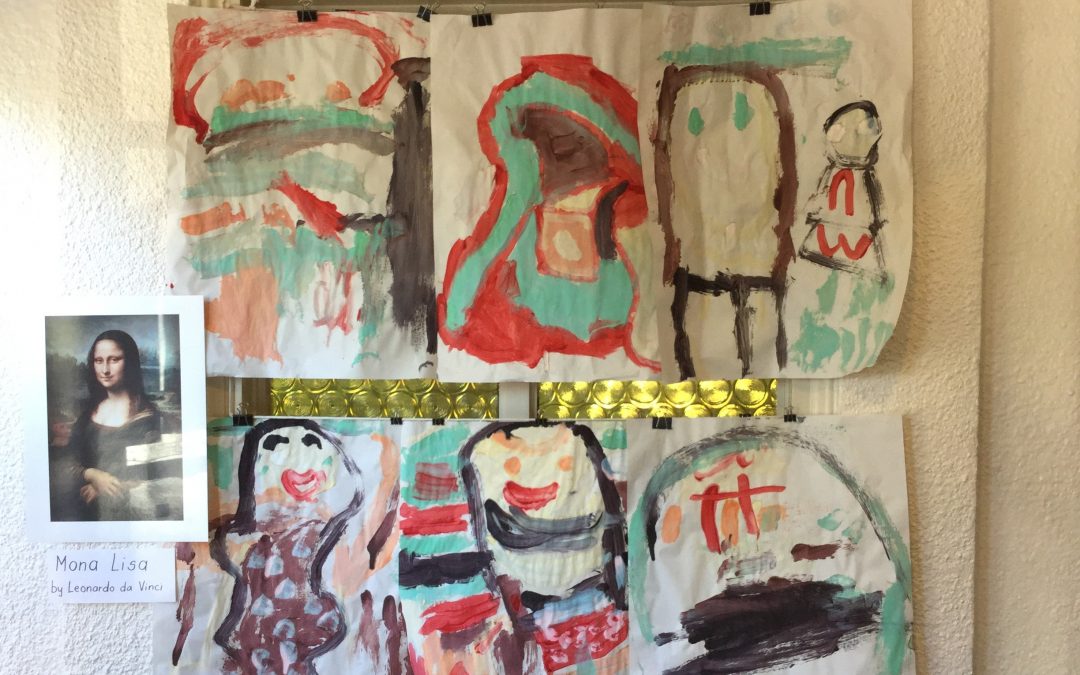
Midday: For our Friday art presentation I introduced Leonardo da Vinci and his most famous
masterpiece, the Mona Lisa. First, I read a picture book about da Vinci’s life and inventions and
discussed how he taught himself about plants, animals, astronomy, architecture, engineering,
music and painting. Then I showed the children a huge print of the Mona Lisa and I asked them
to look closely at it. We talked about the composition of the painting, the famous technique
called ‘sfumato’ that Leonardo used by stacking thin layers of paint on top of each other to
achieve his beautifully blended, mysterious surfaces. We also talked about the Mona Lisa’s
pose: her body is slightly turned away but her face and eyes are looking at the viewer. She is
wearing beautiful and expensive garments, fashionable for noble women of her time. She is
missing eyebrows and eyelashes; one of the theories says that women in those times plucked
their eyebrows and lashes, but according to another theory, Mona Lisa’s eyebrows and eyelashes
got wiped off accidentally due to a cleaning process by not so skilled restaurators. Her hands are
folded over her lap in a calm and graceful way, suitable for a gentlewoman of her era. And then,
the smile of course! The smile that is just a curve of a lip, and a spark of mischief in her eyes that
are staring right at you! No wonder this painting has made the headlines so many times all over
the world! In 1911 it was stolen from the Louvre by an employee, an Italian patriot, who kept it
hidden in his room for two years in hope to give it back to the Italian people who according to
him were the rightful owners of the painting (Leonardo was living in Florence at the time he
started working on the Mona Lisa, but when finished with it four years later, he could not part
with it. He took it with him everywhere he went and this is how, decades later, it ended up in
France where Leonardo died in the court of Francis I of France). We practiced posing like the
Mona Lisa and tried to smile with our mouths closed, teeth not showing. Then I showed the
children how they can paint the portrait of the Mona Lisa themselves. When I present a drawing
or painting project my objective is not to emphasize the likeness of the painting and the model,
but talk through my plan, decisions, choices and technical tips I am applying as I paint. For
example, I show them how to plan where the features will be placed in the paper, how adding a
background makes the portrait pop, how to add patches of light or shadows, etc. Finally, I always
like to point out that this is MY way of painting the Mona Lisa, and that I am sure all the
children will find their OWN way to paint it. All the final projects will look differently, because
we all see and feel things differently, and that is the beauty of art!
Pm: I showed a language work called Labelling where the children read three-letter phonemic
words and then place the labels on the corresponding objects around the room. Here are some of
the words on the labels: box, lid, rug, mat, hat, bag, cup, pen, red, etc. The children did
amazingly well sounding out the words!
Have a wonderful weekend,
Csilla